2013年3月28日木曜日

Installing GitHub 5.0 behind a proxy


GitLabをProxy内で立てたらえらくハマったので書きとめる
元記事 : installation gitlab 5.0
動作環境 : VMware上で動作

1. Packages / Dependencies

apt-getのproxyをとおすためにapt.confにproxyの設定を書きます
hoge@ubuntu:~$ sudo vim /etc/apt/apt.conf

Acquire::http::Proxy "http://proxy.yourcompany.com:8080/";
Acquire::https::proxy "https://proxy.yourcompany.com:8080/";
Acquire::ftp::proxy "ftp://proxy.yourcompany.com:8080/";

apt-get update で ubuntuを最新化
hoge@ubuntu:~$ sudo su
root@ubuntu:/home/hoge# apt-get update
root@ubuntu:/home/hoge# apt-get upgrade -y
root@ubuntu:/home/hoge# exit

他のpackageをインストールする。(postfix以外)
hoge@ubuntu:~$ sudo apt-get install -y build-essential zlib1g-dev libyaml-dev libssl-dev libgdbm-dev libreadline-dev libncurses5-dev libffi-dev curl git-core openssh-server redis-server checkinstall libxml2-dev libxslt-dev libcurl4-openssl-dev libicu-dev

postfixをインストールする。
hoge@ubuntu:~$ sudo apt-get install -y postfix

画面が表示されますが、ひるむことなく <OK> -> No Configuration...

Pythonのversionを確認する。ubuntu 12.04の初期状態の場合 2.7.3のため何もする必要なし。
hoge@ubuntu:~$ python --version
Python 2.7.3

2. Ruby

作業用フォルダに移り
hoge@ubuntu:~$ mkdir /tmp/ruby && cd /tmp/ruby

--proxyオプションでproxyを設定してcurlを実行
hoge@ubuntu:/tmp/ruby$ curl --proxy http://proxy.yourcompany.com:8080 --progress http://ftp.ruby-lang.org/pub/ruby/1.9/ruby-1.9.3-p327.tar.gz | tar xz 

rubyのmake & install は普通に進む
hoge@ubuntu:/tmp/ruby$ cd ruby-1.9.3-p327
hoge@ubuntu:/tmp/ruby/ruby-1.9.3-p327$ ./configure
hoge@ubuntu:/tmp/ruby/ruby-1.9.3-p327$ make
hoge@ubuntu:/tmp/ruby/ruby-1.9.3-p327$ sudo make install

install後rubyのversionを確認
hoge@ubuntu:/tmp/ruby/ruby-1.9.3-p327$ ruby --version
ruby 1.9.3p327 (2012-11-10 revision 37606) [x86_64-linux]

gemのproxy設定をするため「.gemrc」を作成
hoge@ubuntu:/tmp/ruby/ruby-1.9.3-p327$ vi ~/.gemrc

http_proxyの行を追加する
http_proxy: http://proxy.yourcompany.com:8080

bundlerをインストールする
hoge@ubuntu:/tmp/ruby/ruby-1.9.3-p327$ sudo gem install bundler

3. System Users

ユーザgitを作る。
hoge@ubuntu:~$ sudo adduser --disabled-login --gecos 'GitLab' git

あとのGEMでgitコマンドがproxy経由でアクセスできるよう下ごしらえ
参考:まさおのブログ(表):proxyサーバ経由でgitを使う方法
corkscrewをinstall
hoge@ubuntu:~$ sudo apt-get install corkscrew

git-proxy.shを作成
hoge@ubuntu:~$ sudo vi /usr/local/bin/git-proxy.sh

git-proxy.shの内容は以下の通り。proxyサーバを指定する。
#/bin/bash
CORKSCREW=`which corkscrew`
$CORKSCREW proxy.yourcompany.com 8080 $1 $2

パーミッションを変更
hoge@ubuntu:~$ sudo chmod 755 /usr/local/bin/git-proxy.sh

gitユーザのbashrcを開く
hoge@ubuntu:~$ sudo vi /home/git/.bashrc

以下を追加
export HTTP_PROXY=http://proxy.yourcompany.com:8080/
export HTTPS_PROXY=http://proxy.yourcompany.com:8080/
export FTP_PROXY=http://proxy.yourcompany.com:8080/
export GIT_PROXY_COMMAND=/usr/local/bin/git-proxy.sh

4. GitLab shell

ユーザgitに切り替える
hoge@ubuntu:~$ sudo su git

gitのhomeへ移動
hoge@ubuntu:/home/hoge$ cd /home/git

gitlab-shellをclone
hoge@ubuntu:~$ git clone https://github.com/gitlabhq/gitlab-shell.git

あとは流れるままに
git@ubuntu:~$ cd gitlab-shell
git@ubuntu:~$ git checkout v1.1.0
git@ubuntu:~$ git checkout -b v1.1.0
git@ubuntu:~/gitlab-shell$ cp config.yml.example config.yml
git@ubuntu:~/gitlab-shell$ ./bin/install
mkdir -p /home/git/repositories: true
mkdir -p /home/git/.ssh: true
touch /home/git/.ssh/authorized_keys: true
chmod -R ug+rwX,o-rwx /home/git/repositories: true
find /home/git/repositories -type d -print0 | xargs -0 chmod g+s: true

5. Database - MySQL

ここをみてMySQLをセットアップします
一旦gitユーザから出て
git@ubuntu:~/gitlab-shell$ exit

Install the database packages
hoge@ubuntu:~$ sudo apt-get install -y mysql-server mysql-client libmysqlclient-dev

MySQLのrootユーザのパスワードを登録します。

repeat..

mysqlにrootでログイン
hoge@ubuntu:~$ mysql -u root -p
Enter password:

Create User(パスワードを指定して)
mysql> CREATE USER 'gitlab'@'localhost' IDENTIFIED BY '*********';
Query OK, 0 rows affected (0.00 sec)

Create Tableして
mysql> CREATE DATABASE IF NOT EXISTS `gitlabhq_production` DEFAULT CHARACTER SET `utf8` COLLATE `utf8_unicode_ci`;
Query OK, 1 row affected (0.01 sec)

GRANT して
mysql> GRANT SELECT, INSERT, UPDATE, DELETE, CREATE, DROP, INDEX, ALTER ON `gitlabhq_production`.* TO 'gitlab'@'localhost';
Query OK, 0 rows affected (0.01 sec)

MySQLを終了
mysql> \q
Bye

MySQLの接続確認
hoge@ubuntu:~$ sudo -u git -H mysql -u gitlab -p -D gitlabhq_production
Enter password:
Welcome to the MySQL monitor.  Commands end with ; or \g.
Your MySQL connection id is 46
Server version: 5.5.29-0ubuntu0.12.10.1 (Ubuntu)

Copyright (c) 2000, 2012, Oracle and/or its affiliates. All rights reserved.

Oracle is a registered trademark of Oracle Corporation and/or its
affiliates. Other names may be trademarks of their respective
owners.

Type 'help;' or '\h' for help. Type '\c' to clear the current input statement.

mysql> \q
Bye

6. GitLab

gitのhome directoryに移動して
hoge@ubuntu:~$ cd /home/git

gitにログイン
hoge@ubuntu:/home/git$ sudo su git

gitlabをclone
hoge@ubuntu:~$ git clone https://github.com/gitlabhq/gitlabhq.git gitlab

Switched to 5-0-stable.
git@ubuntu:~$ cd gitlab
git@ubuntu:~/gitlab$ git checkout 5-0-stable
Branch 5-0-stable set up to track remote branch 5-0-stable from origin.
Switched to a new branch '5-0-stable'
git@ubuntu:~/gitlab$ exit

Configure it.
hoge@ubuntu:/home/git$ cd /home/git/gitlab
hoge@ubuntu:/home/git/gitlab$ sudo -u git -H cp config/gitlab.yml.example config/gitlab.yml
hoge@ubuntu:/home/git/gitlab$ sudo chown -R git log/
hoge@ubuntu:/home/git/gitlab$ sudo chown -R git tmp/
hoge@ubuntu:/home/git/gitlab$ sudo chmod -R u+rwX  log/
hoge@ubuntu:/home/git/gitlab$ sudo chmod -R u+rwX  tmp/
hoge@ubuntu:/home/git/gitlab$ sudo -u git -H mkdir /home/git/gitlab-satellites
hoge@ubuntu:/home/git/gitlab$ sudo -u git -H mkdir tmp/pids/
hoge@ubuntu:/home/git/gitlab$ sudo chmod -R u+rwX  tmp/pids/
hoge@ubuntu:/home/git/gitlab$ sudo -u git -H cp config/unicorn.rb.example config/unicorn.rb

Configure GitLab DB settings (MySQL)
hoge@ubuntu:/home/git/gitlab$ sudo -u git cp config/database.yml.mysql config/database.yml

open database.yml
hoge@ubuntu:/home/git/gitlab$ sudo -u git vim config/database.yml

username, passwordを変更する
#
# PRODUCTION
#
production:
  adapter: mysql2
  encoding: utf8
  reconnect: false
  database: gitlabhq_production
  pool: 5
  username: root
  password: ********  ## rootのパスワードを記述
  # host: localhost
  # socket: /tmp/mysql.sock

Install Gems
hoge@ubuntu:/home/git/gitlab$ sudo gem install charlock_holmes --version '0.6.9'

bundle install (corkscrewが威力を発揮します)
hoge@ubuntu:/home/git/gitlab$ sudo su git
git@ubuntu:~/gitlab$ bundle install --deployment --without development test postgres
Fetching source index from https://rubygems.org/
Fetching git://github.com/gollum/gollum.git
remote: Counting objects: 12802, done.
remote: Compressing objects: 100% (5571/5571), done.
...

Initialise Database and Activate Advanced Features
git@ubuntu:~/gitlab$ bundle exec rake gitlab:setup RAILS_ENV=production
...
== Seed from /home/git/gitlab/db/fixtures/production/001_admin.rb

Administrator account created:

login.........admin@local.host
password......5iveL!fe
git@ubuntu:~/gitlab$ exit

起動スクリプトを設定
hoge@ubuntu:/home/git/gitlab$ sudo curl --proxy http://proxy.yourcompany:8080 --output /etc/init.d/gitlab https://raw.github.com/gitlabhq/gitlab-recipes/
5-0-stable/init.d/gitlab
hoge@ubuntu:/home/git/gitlab$ sudo chmod +x /etc/init.d/gitlab
hoge@ubuntu:/home/git/gitlab$ sudo update-rc.d gitlab defaults 21

インストール状況を確認
GitLabの環境:
hoge@ubuntu:/home/git/gitlab$ sudo -u git -H bundle exec rake gitlab:env:info RAILS_ENV=production
System information
System:         Ubuntu 12.10
Current User:   git
Using RVM:      no
Ruby Version:   1.9.3p327
Gem Version:    1.8.23
Bundler Version:1.3.4
Rake Version:   10.0.3

GitLab information
Version:        5.0.0
Revision:       4606380
Directory:      /home/git/gitlab
DB Adapter:     mysql2
URL:            http://localhost
HTTP Clone URL: http://localhost/some-project.git
SSH Clone URL:  git@localhost:some-project.git
Using LDAP:     no
Using Omniauth: no

GitLab Shell
Version:        1.2.0
Repositories:   /home/git/repositories/
Hooks:          /home/git/gitlab-shell/hooks/
Git:            /usr/bin/git

チェックを実行: 何かErrorが出ていたら要確認。
hoge@ubuntu:/home/git/gitlab$ sudo -u git -H bundle exec rake gitlab:check RAILS_ENV=production
Checking Environment ...

Git configured for git user? ... no
  Try fixing it:
  sudo -u git -H git config --global user.name  "GitLab"
  sudo -u git -H git config --global user.email "gitlab@localhost"
  For more information see:
  doc/install/installation.md in section "GitLab"
  Please fix the error above and rerun the checks.

...

Projects have satellites? ... can't check, you have no projects

Checking GitLab ... Finished

GitLab Serviceをstart!
hoge@ubuntu:/home/git/gitlab$ sudo service gitlab start
Gitlab service started

7. Nginx

nginxをinstall
hoge@ubuntu:~$ sudo apt-get install nginx

Download an example site config:
hoge@ubuntu:~$ sudo curl --proxy http://proxy.yourcompany.com:8080 --output /etc/nginx/sites-available/gitlab https://raw.github.com/gitlabhq/gitlab-recipes/5-0-stable/nginx/gitlab
...
hoge@ubuntu:~$ sudo ln -s /etc/nginx/sites-available/gitlab /etc/nginx/sites-enabled/gitlab

IPAddressとserver_nameを指定します
hoge@ubuntu:~$ sudo vim /etc/nginx/sites-available/gitlab

server {                                                                          
  listen 192.168.137.xxx:80 default_server;   # change it
  server_name yourservername.com;             # change it
  root /home/git/gitlab/public;

nginxを再起動
hoge@ubuntu:~$ sudo service nginx restart
Restarting nginx: nginx.

Reference

http://elinux.org/Using_git_with_a_proxy

2013年3月27日水曜日

VMware De Ubuntu


VMwareでUbuntuを入れる

ubuntu 12.04 (amd64) をダウンロード。
  http://www.ubuntu.com/download/server


vmwareにゲストOSを新規インストール。「後でOSをインストールを指定


ゲストOSはLinuxでバージョンは「Ubuntu 64 ビット」


仮想マシン名を適当に指定する


つれづれなるままに。


「完了」


Ubuntuインストール
Install画面で「English」を指定


「Install Ubuntu Server」でEnter押下


「English」でEnter押下(日本語は文字化けするので。。。)


「United States」でEnter。


お人よしにもほどがあるのででEnter


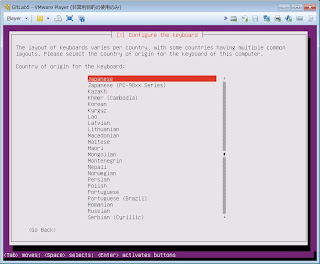
Keyboardは「Japanese」


「Japanese」


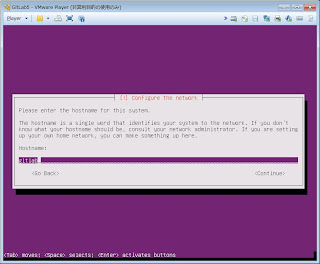
 Serverの名前を適当に決めて


管理者の名前を決めて


管理者のアカウントを決めて


管理者のパスワードを入れて


もう一度入れて


でEnter


「Select from worldwide list」でEnter


「Asia」から「Tokyo」を探してEnter


仮想環境上でのLVMのメリットを疑いつつも指定。


Enter...


でEnter


 Enter...


でEnter


proxyサーバには「http://proxy.yourcompany.com:8080/」的な感じで設定する。


自動更新してもらうと困るので「No automatic updates」でEnter


「OpenSSH server」だけは外せない。spaceで指定してEnter


仮想OS上でGRUBにできることとは何かと考えるないで、でEnter


インストールは終了


ネットワーク設定


VMwareのネットワーク確認、及びネットワーク共有をします。


今回は以下の設定で
IPADDR192.168.137.111
NETMASK255.255.255.0
NETWORK192.168.137.0
GATEWAY192.168.137.1
DNS192.168.137.1


とりあえず管理者でログインして
ubuntu login:tkym

IPアドレスを固定にするため設定を書きなおします。
tkym@ubuntu:~$ sudo vi /etc/network/interfaces

# This file describes the network interfaces available on your system
# and how to activate them. For more information, see interfaces(5).

# The loopback network interface
auto lo
iface lo inet loopback

# The primary network interface
auto eth0
# iface eth0 inet dhcp
iface eth0 inet static
        address 192.168.137.111
        network 192.168.137.0
        netmask 255.255.255.0
        broadcast 192.168.137.255
        gateway 192.168.137.1
        dns-nameservers 192.168.137.1

ネットワークを再実行します。
tkym@ubuntu:~$ sudo /etc/init.d/networking restart

これでTera Termで入れます。

2013年3月20日水曜日

Virtual De Hadoop(CDH4) Part.1

事前準備

ゲストOSとしてCentOSがインストールされている状態にしておきます。

Windows7+vmwareの場合:

MacOS+Parallelsの場合:


Oracle JDKのインストール

Oracle社のサイトでJDKをダウンロードさせて頂きます。

JDK6をDownloadすることにします

「Accept License Agreement」を選択して、「jdk-6u43-linux-x64-rpm.bin」をクリックします

ダウンロードが始まるや否や、処理を一時停止させます。
ダウンロード一覧からダウンロード先のパスをコピーします。(図はchromeの場合)


wgetコマンドの後ろにコピーしたパスを貼付けて、jdkをダウンロードします
[root@hadoop /]# wget http://download.oracle.com/otn-pub/java/jdk/6u43-b01/jdk-6u43-linux-x64-rpm.bin?AuthParam=1234567890_abcdefgeaxxxxxxxxxxxx

tmpフォルダへ移動かつファイル名を変えます
[root@hadoop /]# mv jdk-6u43-linux-x64-rpm.bin?AuthParam=1234567890_abcdefgeaxxxxxxxxxxxx /tmp/jdk-6u43-linux-x64-rpm.bin

実行権限を与えて展開+インストールします
[root@hadoop /]# cd tmp
[root@hadoop tmp]# chmod +x jdk-6u43-linux-x64-rpm.bin 
[root@hadoop tmp]# ./jdk-6u43-linux-x64-rpm.bin 

JDKがインストールされたか確認します
[root@hadoop tmp]# rpm -qi jdk
Name        : jdk                          Relocations: /usr/java 
Version     : 1.6.0_43                          Vendor: Oracle and/or its affiliates.
Release     : fcs                           Build Date: 2013年03月01日 22時03分27秒
Install Date: 2013年03月20日 12時44分53秒      Build Host: jb6-lin-amd64.sfbay.sun.com
Group       : Development/Tools             Source RPM: jdk-1.6.0_43-fcs.src.rpm
Size        : 127075557                        License: Copyright (c) 2011, Oracle and/or its affiliates. All rights reserved. Also under other license(s) as shown at the Description field.
Signature   : (none)
Packager    : Java Software 
URL         : http://www.oracle.com/technetwork/java/javase/overview/index.html
Summary     : Java(TM) Platform Standard Edition Development Kit
Description :
The Java Platform Standard Edition Development Kit (JDK) includes both
the runtime environment (Java virtual machine, the Java platform classes
and supporting files) and development tools (compilers, debuggers,
tool libraries and other tools).

The JDK is a development environment for building applications, applets
and components that can be deployed with the Java Platform Standard
Edition Runtime Environment.

JAVA_HOMEのパスを通します
[root@hadoop /]# echo "export JAVA_HOME=/usr/java/default" >> /etc/bashrc
[root@hadoop /]# source /etc/bashrc
[root@hadoop /]# echo $JAVA_HOME
/usr/java/default

Hadoop(CDH4)インストールの事前準備

以下のサイトを読みつつ、CDH4のHadoop(2.0系)のレポジトリをインストールします
https://ccp.cloudera.com/display/CDH4DOC/CDH4+Installation
[root@hadoop tmp]# wget http://archive.cloudera.com/cdh4/one-click-install/redhat/6/x86_64/cloudera-cdh-4-0.x86_64.rpm

cloudera-cdhをインストールします
[root@hadoop tmp]# sh
Loaded plugins: fastestmirror, presto
Setting up Local Package Process
Examining cloudera-cdh-4-0.x86_64.rpm: cloudera-cdh-4-0.x86_64
Marking cloudera-cdh-4-0.x86_64.rpm to be installed
Loading mirror speeds from cached hostfile
 * base: ftp.iij.ad.jp
 * extras: ftp.iij.ad.jp
 * updates: centos.ustc.edu.cn
base                                                     | 3.7 kB     00:00
extras                                                   | 3.5 kB     00:00
updates                                                  | 3.5 kB     00:00
Not using downloaded repomd.xml because it is older than what we have:
  Current   : Tue Mar 19 05:14:29 2013
  Downloaded: Sat Mar  9 03:07:50 2013

...

Total size: 13 k
Installed size: 13 k

yes...
Is this ok [y/N]: y
Downloading Packages:
Running rpm_check_debug
Running Transaction Test
Transaction Test Succeeded
Running Transaction
  Installing : cloudera-cdh-4-0.x86_64                                      1/1
  Verifying  : cloudera-cdh-4-0.x86_64                                      1/1

Installed:
  cloudera-cdh.x86_64 0:4-0

Complete!

yumを更新
[root@hadoop tmp]# yum update yum
Loaded plugins: fastestmirror, presto
Loading mirror speeds from cached hostfile
 * base: ftp.iij.ad.jp
 * extras: ftp.iij.ad.jp
 * updates: centos.ustc.edu.cn
cloudera-cdh4                                            |  951 B     00:00
cloudera-cdh4/primary                                    |  29 kB     00:00
cloudera-cdh4                                                             95/95
Setting up Update Process
No Packages marked for Update

yum で hadoopを検索します
[root@hadoop tmp]# yum search hadoop 
Loaded plugins: fastestmirror, presto
Loading mirror speeds from cached hostfile
 * base: ftp.iij.ad.jp
 * extras: ftp.iij.ad.jp
 * updates: centos.ustc.edu.cn
============================= N/S Matched: hadoop ==============================
hadoop.x86_64 : Hadoop is a software platform for processing vast amounts of
              : data
hadoop-0.20-conf-pseudo.x86_64 : Hadoop installation in pseudo-distributed mode
...
  Name and summary matches only, use "search all" for everything.

Hadoop起動用のユーザとグループを作成します
[root@hadoop /]# groupadd -g 1000 hadoop
[root@hadoop /]# useradd -g hadoop -u 1000 hadoop
[root@hadoop /]# passwd hadoop

hadoopユーザに切り替えます
[root@hadoop /]# su hadoop
[hadoop@hadoop /]$ 


次回へ続く

Parallels De CentOS Part.2 CentOSのネットワーク設定

前回の続き

Parallels Desktopのネットワーク確認

メニューから[Parallels Desktop]-[環境設定] をクリックします
ネットワーク:「設定の変更」ボタンをクリックします


開始アドレスと終了アドレスを確認し、ゲストOSで使用するIPアドレスを決定する。
※ゲストOSのIPアドレスを「10.211.55.101」とします。


Parallels Desktopのネットワーク確認

ゲストOSにrootでログインします
hadoop login:root
Password:
Last login: ...
[root@hadoop ~]#

ネットワーク設定のため、ifcfg-eth0をviで開きます
[root@hadoop ~]# vi /etc/sysconfig/network-scripts/ifcfg-eth0

ほとんど何も書かれていないので、[i](insert mode)して、以下の設定を記載し、[Esc]+[:wq]で書き込み終了します(ボールドが変更する箇所)
DEVICE="eth0"
BOOTPROTO=static
HWADDR="xx:xx:xx:xx:xx:xx"
IPADDR=10.211.55.101
NETMASK=255.255.255.0
NETWORK=10.211.55.0
GATEWAY=10.211.55.1
BROADCAST=10.211.55.255
NM_CONTROLLED="no"
ONBOOT="yes"
PEERDNS="no"

DNSを設定します。/etc/resolv.confをviで開きます
[root@hadoop ~]# vi /etc/resolv.conf

何も書かれていないので、[i](insert mode)で設定を記載して、[Esc]+[:wq]で書き込み終了します
nameserver 10.211.55.1

ネットワークを再起動します
[root@hadoop ~]# /etc/rc.d/init.d/network start

ifconfigでネットワーク確認します
[root@hadoop ~]# ifconfig
eth0  Link encap:Ethernet  HWaddr xx:xx:xx:xx:xx:xx  
          inet addr:10.211.55.101  Bcast:10.211.55.255  Mask:255.255.255.0
          inet6 addr: fec0::fea9:21c:42ff:fee4:998f/64 Scope:Site
          inet6 addr: fe80::21c:42ff:fee4:998f/64 Scope:Link
          UP BROADCAST RUNNING MULTICAST  MTU:1500  Metric:1
          RX packets:67 errors:0 dropped:0 overruns:0 frame:0
          TX packets:51 errors:0 dropped:0 overruns:0 carrier:0
          collisions:0 txqueuelen:1000 
          RX bytes:8494 (8.2 KiB)  TX bytes:5893 (5.7 KiB)

lo        Link encap:Local Loopback  
          inet addr:127.0.0.1  Mask:255.0.0.0
          inet6 addr: ::1/128 Scope:Host
          UP LOOPBACK RUNNING  MTU:16436  Metric:1
          RX packets:0 errors:0 dropped:0 overruns:0 frame:0
          TX packets:0 errors:0 dropped:0 overruns:0 carrier:0
          collisions:0 txqueuelen:0 
          RX bytes:0 (0.0 b)  TX bytes:0 (0.0 b)

MacOSのターミナルからpingします
macBook-Air:~ hogehoge$ ping 10.211.55.101
PING 10.211.55.101 (10.211.55.101): 56 data bytes
64 bytes from 10.211.55.101: icmp_seq=0 ttl=64 time=0.319 ms
64 bytes from 10.211.55.101: icmp_seq=1 ttl=64 time=0.397 ms
64 bytes from 10.211.55.101: icmp_seq=2 ttl=64 time=0.400 ms
64 bytes from 10.211.55.101: icmp_seq=3 ttl=64 time=0.682 ms

sshでログインします
macBook-Air:~ hogehoge$ ssh -l root 10.211.55.101

警告が表示されますがひるまずにパスワードを設定します
The authenticity of host '10.211.55.101 (10.211.55.101)' can't be established.
RSA key fingerprint is xx:xx:xx:xx:xx:xx:xx:xx:xx:xx:xx:xx:.
Are you sure you want to continue connecting (yes/no)? yes
Warning: Permanently added '10.211.55.101' (RSA) to the list of known hosts.
root@10.211.55.101's password: 

yum update & wget install

yum updateを実行します
[root@hadoop ~]# yum update

yes
Is this ok [y/N]: y

さらにyes
警告: rpmts_HdrFromFdno: ヘッダ V3 RSA/SHA1 Signature, key ID c105b9de: NOKEY
Retrieving key from file:///etc/pki/rpm-gpg/RPM-GPG-KEY-CentOS-6
Importing GPG key 0xC105B9DE:
 Userid : CentOS-6 Key (CentOS 6 Official Signing Key) 
 Package: centos-release-6-2.el6.centos.7.x86_64 (@anaconda-CentOS-201112091719.x86_64/6.2)
 From   : /etc/pki/rpm-gpg/RPM-GPG-KEY-CentOS-6
Is this ok [y/N]: y

終わるまでしばらく待ちます
  udev.x86_64 0:147-2.46.el6
  upstart.x86_64 0:0.6.5-12.el6
  util-linux-ng.x86_64 0:2.17.2-12.9.el6
  vim-minimal.x86_64 2:7.2.411-1.8.el6
  xfsprogs.x86_64 0:3.1.1-10.el6
  yum.noarch 0:3.2.29-40.el6.centos
  yum-plugin-fastestmirror.noarch 0:1.1.30-14.el6
  zlib.x86_64 0:1.2.3-29.el6

Complete!

wgetをインストールします
[root@hadoop ~]# yum -y install wget

次回に続く

2013年3月19日火曜日

VMware De CentOS Part.2 CentOSのネットワーク設定

前回の続き

VMwareのネットワーク確認

VMwareのネットワーク環境を確認します。「接続」の「VMware Network Adapter VMnet8」をクリックします。


「VMware Network Adapter VMnet8の状態」ダイアログで「プロパティ」をクリックします

「VMware Network Adapter VMnet8のプロパティ」ダイアログで「インターネット プロトコル バージョン 4(TCP/IPv4)」を選択して「プロパティ」をクリックします。

表示されたIPアドレスをメモします


VMwareのネットワーク共有

「ローカルエリア接続」をクリックします


「ローカルエリア接続の状態」で「プロパティ」ボタンをクリックします

「ローカルエリア接続のプロパティ」の「共有」タグを開いて、「ネットワークのほかのユーザに、このコンピュータのインターネット接続をとおしての接続を許可する」にチェックします
「ホームネットワーク接続」で「VMware Network Adapter VMnet8」を指定します


「OK」を押すと何やら警告めいた画面が出ますが、ひるまずに閉じます。


CentOSのネットワーク設定


ゲストOSでrootユーザでログインします。
hadoop login:root
Password:
Last login: ...
[root@hadoop ~]#

ネットワーク設定のため、ifcfg-eth0をviで開きます
[root@hadoop ~]# vi /etc/sysconfig/network-scripts/ifcfg-eth0

ほとんど何も書かれていないので、[i](insert mode)して、以下の設定を記載し、[Esc]+[:wq]で書き込み終了します(ボールドが変更する箇所)
DEVICE="eth0"
BOOTPROTO=static
HWADDR="xx:xx:xx:xx:xx:xx"
IPADDR=192.168.137.101
NETMASK=255.255.255.0
NETWORK=192.168.137.0
GATEWAY=192.168.137.1
BROADCAST=192.168.137.255
NM_CONTROLLED="no"
ONBOOT="yes"
PEERDNS="no"


DNS設定のため、/etc/resolv.confをviで開きます
[root@hadoop ~]# vi /etc/resolv.conf

何も書かれていないので、[i](insert mode)で設定を記載して、[Esc]+[:wq]で書き込み終了します
nameserver 192.168.137.1

ネットワークを再起動します
[root@hadoop ~]# /etc/rc.d/init.d/network start

ifconfigでネットワーク確認します
[root@hadoop ~]# ifconfig
eth0      Link encap:Ethernet  HWaddr xx:xx:xx:xx:xx:xx
          inet addr:192.168.137.101  Bcast:192.168.137.255  Mask:255.255.255.0
          inet6 addr: fe80::20c:29ff:fe16:27c3/64 Scope:Link
          UP BROADCAST RUNNING MULTICAST  MTU:1500  Metric:1
          RX packets:697 errors:0 dropped:0 overruns:0 frame:0
          TX packets:178 errors:0 dropped:0 overruns:0 carrier:0
          collisions:0 txqueuelen:1000
          RX bytes:79044 (77.1 KiB)  TX bytes:17405 (16.9 KiB)

lo        Link encap:Local Loopback
          inet addr:127.0.0.1  Mask:255.0.0.0
          inet6 addr: ::1/128 Scope:Host
          UP LOOPBACK RUNNING  MTU:16436  Metric:1
          RX packets:53 errors:0 dropped:0 overruns:0 frame:0
          TX packets:53 errors:0 dropped:0 overruns:0 carrier:0
          collisions:0 txqueuelen:0
          RX bytes:4928 (4.8 KiB)  TX bytes:4928 (4.8 KiB)

Tera Termから接続

ホストOS(Windows)で「Tera Term」を起動します。
ホストにCentOSのIPアドレスを指定し、サービスを「SSH」を指定して「OK」をクリックします。


「セキュリティ警告」が表示されますが、ひるまずに「OK」をクリックします。


ユーザ名を「root」、パスフレーズにパスワードを指定して「OK」をクリックします


無事接続されました。おめでとうございます。


Proxy経由でyum,wget


Proxyが設定されているネットワーク環境の場合、yum.confで設定する必要があります。yum.confをviで開きます
[root@hadoop ~]# vi /etc/yum.conf

proxyのhost(proxy.yourcompany.com)とport(8080)を以下のように記述します
proxy=http://proxy.yourcompany.com:8080

yum updateでOSをアップデート
[root@hadoop ~]# yum update

盲目的にyes
Is this ok [y/N]: y

どんなことがあっても盲目的にyes
警告: rpmts_HdrFromFdno: ヘッダ V3 RSA/SHA1 Signature, key ID c105b9de: NOKEY
Retrieving key from file:///etc/pki/rpm-gpg/RPM-GPG-KEY-CentOS-6
Importing GPG key 0xC105B9DE:
 Userid : CentOS-6 Key (CentOS 6 Official Signing Key) 
 Package: centos-release-6-2.el6.centos.7.x86_64 (@anaconda-CentOS-201112091719.x86_64/6.2)
 From   : /etc/pki/rpm-gpg/RPM-GPG-KEY-CentOS-6
Is this ok [y/N]: y

しばらくしたら終わります。
  udev.x86_64 0:147-2.46.el6
  upstart.x86_64 0:0.6.5-12.el6
  util-linux-ng.x86_64 0:2.17.2-12.9.el6
  vim-minimal.x86_64 2:7.2.411-1.8.el6
  xfsprogs.x86_64 0:3.1.1-10.el6
  yum.noarch 0:3.2.29-40.el6.centos
  yum-plugin-fastestmirror.noarch 0:1.1.30-14.el6
  zlib.x86_64 0:1.2.3-29.el6

Complete!

wget をインストールします
[root@hadoop ~]# yum -y install wget

wgetのProxyを設定するため、wgetrcをviで編集します
[root@hadoop ~]# vi /etc/wgetrc

http_proxyの行を追加します
# You can set the default proxies for Wget to use for http, https, and ftp.
# They will override the value in the environment.
#https_proxy = http://proxy.yoyodyne.com:18023/
#http_proxy = http://proxy.yoyodyne.com:18023/
#ftp_proxy = http://proxy.yoyodyne.com:18023/
http_proxy = http://proxy.yourcompany.com:8080/
https_proxy = https://proxy.yourcompany.com:8080/
ftp_proxy = http://proxy.yourcompany.com:8080/

次回に続く

VMware De CentOS Part.1 CentOSのインストール

Part1. CentOSのインストール

目標
  • VMWareの簡易ツールを使わずに素の状態でCentOS(minimal)をインストールする

事前準備
  • ここでVMware Playerの無償版をダウンロード&インストール
  • SSHのクライアントとしてここでTeraTermをダウンロード&インストール

以下のmirrorからCentOS6.2のisoイメージをダウンロードしておく。

VMware Playerを起動して、「新規仮想マシンを作成」をクリックします


「後でOSをインストール」を選択して「次へ」をクリックします


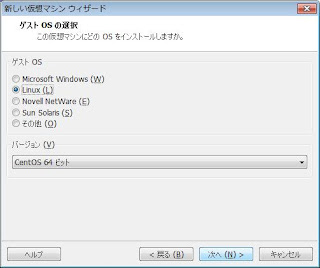
ゲストOSを「Linux」、バージョンを「Cent OS 64 ビット」を選択して「次へ」をクリックします


「仮想マシン名」を命名して「次へ」をクリックします


あまり考えずに「次へ」をクリックします


「完了」をクリックします


VMwareから作成した仮想マシンを選択して「仮想マシンの設定の編集」をクリックします


デバイスでCD/DVDを選択して、「ISOイメージファイルを使用する」にダウンロードしたCentOSのisoイメージを指定して、「OK」をクリックします。


以下の画面で「Install or Upgrade an existing System」で【Enter】を押下します

以下で「Skip」を選択して【Enter】を押下します

おもむろにVMwareの画面が大きくなりますが、ひるまずに「next」をクリックします。


グローバルじゃない人は「Japanese(日本語)」を選択して、「next」をクリックします。


キーボードは「日本語」を選択して、「次」をクリックします。


あまり考えずに「次」をクリックします。


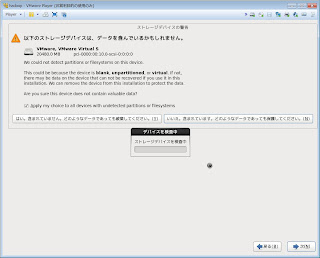
「はい、含まれていません。」と強がりながら「次」をクリックします。


ホスト名に適当な名前を命名して「次」をクリックします


「アジア/東京」を選択して「次」をクリックします


rootパスワードに適当なパスワードを、及び確認にも同じパスワードを入力して「次」をクリックします


「Use All Space」が選択されており、かつ「パーティションのレイアウトをレビューまたは修正する」のチェックが外れていることを確認して「次」をクリックします。


警告にひるむことなく、「write changes to disk」をクリックします


インストールが進むのをひたすら待ちます。


「おめでとうございます。」に浮かれることなく「再起動」をクリックします