ラベル centos の投稿を表示しています。 すべての投稿を表示

2013年3月20日水曜日

Virtual De Hadoop(CDH4) Part.1

事前準備

ゲストOSとしてCentOSがインストールされている状態にしておきます。

Windows7+vmwareの場合:

MacOS+Parallelsの場合:


Oracle JDKのインストール

Oracle社のサイトでJDKをダウンロードさせて頂きます。

JDK6をDownloadすることにします

「Accept License Agreement」を選択して、「jdk-6u43-linux-x64-rpm.bin」をクリックします

ダウンロードが始まるや否や、処理を一時停止させます。
ダウンロード一覧からダウンロード先のパスをコピーします。(図はchromeの場合)


wgetコマンドの後ろにコピーしたパスを貼付けて、jdkをダウンロードします
[root@hadoop /]# wget http://download.oracle.com/otn-pub/java/jdk/6u43-b01/jdk-6u43-linux-x64-rpm.bin?AuthParam=1234567890_abcdefgeaxxxxxxxxxxxx

tmpフォルダへ移動かつファイル名を変えます
[root@hadoop /]# mv jdk-6u43-linux-x64-rpm.bin?AuthParam=1234567890_abcdefgeaxxxxxxxxxxxx /tmp/jdk-6u43-linux-x64-rpm.bin

実行権限を与えて展開+インストールします
[root@hadoop /]# cd tmp
[root@hadoop tmp]# chmod +x jdk-6u43-linux-x64-rpm.bin 
[root@hadoop tmp]# ./jdk-6u43-linux-x64-rpm.bin 

JDKがインストールされたか確認します
[root@hadoop tmp]# rpm -qi jdk
Name        : jdk                          Relocations: /usr/java 
Version     : 1.6.0_43                          Vendor: Oracle and/or its affiliates.
Release     : fcs                           Build Date: 2013年03月01日 22時03分27秒
Install Date: 2013年03月20日 12時44分53秒      Build Host: jb6-lin-amd64.sfbay.sun.com
Group       : Development/Tools             Source RPM: jdk-1.6.0_43-fcs.src.rpm
Size        : 127075557                        License: Copyright (c) 2011, Oracle and/or its affiliates. All rights reserved. Also under other license(s) as shown at the Description field.
Signature   : (none)
Packager    : Java Software 
URL         : http://www.oracle.com/technetwork/java/javase/overview/index.html
Summary     : Java(TM) Platform Standard Edition Development Kit
Description :
The Java Platform Standard Edition Development Kit (JDK) includes both
the runtime environment (Java virtual machine, the Java platform classes
and supporting files) and development tools (compilers, debuggers,
tool libraries and other tools).

The JDK is a development environment for building applications, applets
and components that can be deployed with the Java Platform Standard
Edition Runtime Environment.

JAVA_HOMEのパスを通します
[root@hadoop /]# echo "export JAVA_HOME=/usr/java/default" >> /etc/bashrc
[root@hadoop /]# source /etc/bashrc
[root@hadoop /]# echo $JAVA_HOME
/usr/java/default

Hadoop(CDH4)インストールの事前準備

以下のサイトを読みつつ、CDH4のHadoop(2.0系)のレポジトリをインストールします
https://ccp.cloudera.com/display/CDH4DOC/CDH4+Installation
[root@hadoop tmp]# wget http://archive.cloudera.com/cdh4/one-click-install/redhat/6/x86_64/cloudera-cdh-4-0.x86_64.rpm

cloudera-cdhをインストールします
[root@hadoop tmp]# sh
Loaded plugins: fastestmirror, presto
Setting up Local Package Process
Examining cloudera-cdh-4-0.x86_64.rpm: cloudera-cdh-4-0.x86_64
Marking cloudera-cdh-4-0.x86_64.rpm to be installed
Loading mirror speeds from cached hostfile
 * base: ftp.iij.ad.jp
 * extras: ftp.iij.ad.jp
 * updates: centos.ustc.edu.cn
base                                                     | 3.7 kB     00:00
extras                                                   | 3.5 kB     00:00
updates                                                  | 3.5 kB     00:00
Not using downloaded repomd.xml because it is older than what we have:
  Current   : Tue Mar 19 05:14:29 2013
  Downloaded: Sat Mar  9 03:07:50 2013

...

Total size: 13 k
Installed size: 13 k

yes...
Is this ok [y/N]: y
Downloading Packages:
Running rpm_check_debug
Running Transaction Test
Transaction Test Succeeded
Running Transaction
  Installing : cloudera-cdh-4-0.x86_64                                      1/1
  Verifying  : cloudera-cdh-4-0.x86_64                                      1/1

Installed:
  cloudera-cdh.x86_64 0:4-0

Complete!

yumを更新
[root@hadoop tmp]# yum update yum
Loaded plugins: fastestmirror, presto
Loading mirror speeds from cached hostfile
 * base: ftp.iij.ad.jp
 * extras: ftp.iij.ad.jp
 * updates: centos.ustc.edu.cn
cloudera-cdh4                                            |  951 B     00:00
cloudera-cdh4/primary                                    |  29 kB     00:00
cloudera-cdh4                                                             95/95
Setting up Update Process
No Packages marked for Update

yum で hadoopを検索します
[root@hadoop tmp]# yum search hadoop 
Loaded plugins: fastestmirror, presto
Loading mirror speeds from cached hostfile
 * base: ftp.iij.ad.jp
 * extras: ftp.iij.ad.jp
 * updates: centos.ustc.edu.cn
============================= N/S Matched: hadoop ==============================
hadoop.x86_64 : Hadoop is a software platform for processing vast amounts of
              : data
hadoop-0.20-conf-pseudo.x86_64 : Hadoop installation in pseudo-distributed mode
...
  Name and summary matches only, use "search all" for everything.

Hadoop起動用のユーザとグループを作成します
[root@hadoop /]# groupadd -g 1000 hadoop
[root@hadoop /]# useradd -g hadoop -u 1000 hadoop
[root@hadoop /]# passwd hadoop

hadoopユーザに切り替えます
[root@hadoop /]# su hadoop
[hadoop@hadoop /]$ 


次回へ続く

Parallels De CentOS Part.2 CentOSのネットワーク設定

前回の続き

Parallels Desktopのネットワーク確認

メニューから[Parallels Desktop]-[環境設定] をクリックします
ネットワーク:「設定の変更」ボタンをクリックします


開始アドレスと終了アドレスを確認し、ゲストOSで使用するIPアドレスを決定する。
※ゲストOSのIPアドレスを「10.211.55.101」とします。


Parallels Desktopのネットワーク確認

ゲストOSにrootでログインします
hadoop login:root
Password:
Last login: ...
[root@hadoop ~]#

ネットワーク設定のため、ifcfg-eth0をviで開きます
[root@hadoop ~]# vi /etc/sysconfig/network-scripts/ifcfg-eth0

ほとんど何も書かれていないので、[i](insert mode)して、以下の設定を記載し、[Esc]+[:wq]で書き込み終了します(ボールドが変更する箇所)
DEVICE="eth0"
BOOTPROTO=static
HWADDR="xx:xx:xx:xx:xx:xx"
IPADDR=10.211.55.101
NETMASK=255.255.255.0
NETWORK=10.211.55.0
GATEWAY=10.211.55.1
BROADCAST=10.211.55.255
NM_CONTROLLED="no"
ONBOOT="yes"
PEERDNS="no"

DNSを設定します。/etc/resolv.confをviで開きます
[root@hadoop ~]# vi /etc/resolv.conf

何も書かれていないので、[i](insert mode)で設定を記載して、[Esc]+[:wq]で書き込み終了します
nameserver 10.211.55.1

ネットワークを再起動します
[root@hadoop ~]# /etc/rc.d/init.d/network start

ifconfigでネットワーク確認します
[root@hadoop ~]# ifconfig
eth0  Link encap:Ethernet  HWaddr xx:xx:xx:xx:xx:xx  
          inet addr:10.211.55.101  Bcast:10.211.55.255  Mask:255.255.255.0
          inet6 addr: fec0::fea9:21c:42ff:fee4:998f/64 Scope:Site
          inet6 addr: fe80::21c:42ff:fee4:998f/64 Scope:Link
          UP BROADCAST RUNNING MULTICAST  MTU:1500  Metric:1
          RX packets:67 errors:0 dropped:0 overruns:0 frame:0
          TX packets:51 errors:0 dropped:0 overruns:0 carrier:0
          collisions:0 txqueuelen:1000 
          RX bytes:8494 (8.2 KiB)  TX bytes:5893 (5.7 KiB)

lo        Link encap:Local Loopback  
          inet addr:127.0.0.1  Mask:255.0.0.0
          inet6 addr: ::1/128 Scope:Host
          UP LOOPBACK RUNNING  MTU:16436  Metric:1
          RX packets:0 errors:0 dropped:0 overruns:0 frame:0
          TX packets:0 errors:0 dropped:0 overruns:0 carrier:0
          collisions:0 txqueuelen:0 
          RX bytes:0 (0.0 b)  TX bytes:0 (0.0 b)

MacOSのターミナルからpingします
macBook-Air:~ hogehoge$ ping 10.211.55.101
PING 10.211.55.101 (10.211.55.101): 56 data bytes
64 bytes from 10.211.55.101: icmp_seq=0 ttl=64 time=0.319 ms
64 bytes from 10.211.55.101: icmp_seq=1 ttl=64 time=0.397 ms
64 bytes from 10.211.55.101: icmp_seq=2 ttl=64 time=0.400 ms
64 bytes from 10.211.55.101: icmp_seq=3 ttl=64 time=0.682 ms

sshでログインします
macBook-Air:~ hogehoge$ ssh -l root 10.211.55.101

警告が表示されますがひるまずにパスワードを設定します
The authenticity of host '10.211.55.101 (10.211.55.101)' can't be established.
RSA key fingerprint is xx:xx:xx:xx:xx:xx:xx:xx:xx:xx:xx:xx:.
Are you sure you want to continue connecting (yes/no)? yes
Warning: Permanently added '10.211.55.101' (RSA) to the list of known hosts.
root@10.211.55.101's password: 

yum update & wget install

yum updateを実行します
[root@hadoop ~]# yum update

yes
Is this ok [y/N]: y

さらにyes
警告: rpmts_HdrFromFdno: ヘッダ V3 RSA/SHA1 Signature, key ID c105b9de: NOKEY
Retrieving key from file:///etc/pki/rpm-gpg/RPM-GPG-KEY-CentOS-6
Importing GPG key 0xC105B9DE:
 Userid : CentOS-6 Key (CentOS 6 Official Signing Key) 
 Package: centos-release-6-2.el6.centos.7.x86_64 (@anaconda-CentOS-201112091719.x86_64/6.2)
 From   : /etc/pki/rpm-gpg/RPM-GPG-KEY-CentOS-6
Is this ok [y/N]: y

終わるまでしばらく待ちます
  udev.x86_64 0:147-2.46.el6
  upstart.x86_64 0:0.6.5-12.el6
  util-linux-ng.x86_64 0:2.17.2-12.9.el6
  vim-minimal.x86_64 2:7.2.411-1.8.el6
  xfsprogs.x86_64 0:3.1.1-10.el6
  yum.noarch 0:3.2.29-40.el6.centos
  yum-plugin-fastestmirror.noarch 0:1.1.30-14.el6
  zlib.x86_64 0:1.2.3-29.el6

Complete!

wgetをインストールします
[root@hadoop ~]# yum -y install wget

次回に続く

2013年3月19日火曜日

VMware De CentOS Part.2 CentOSのネットワーク設定

前回の続き

VMwareのネットワーク確認

VMwareのネットワーク環境を確認します。「接続」の「VMware Network Adapter VMnet8」をクリックします。


「VMware Network Adapter VMnet8の状態」ダイアログで「プロパティ」をクリックします

「VMware Network Adapter VMnet8のプロパティ」ダイアログで「インターネット プロトコル バージョン 4(TCP/IPv4)」を選択して「プロパティ」をクリックします。

表示されたIPアドレスをメモします


VMwareのネットワーク共有

「ローカルエリア接続」をクリックします


「ローカルエリア接続の状態」で「プロパティ」ボタンをクリックします

「ローカルエリア接続のプロパティ」の「共有」タグを開いて、「ネットワークのほかのユーザに、このコンピュータのインターネット接続をとおしての接続を許可する」にチェックします
「ホームネットワーク接続」で「VMware Network Adapter VMnet8」を指定します


「OK」を押すと何やら警告めいた画面が出ますが、ひるまずに閉じます。


CentOSのネットワーク設定


ゲストOSでrootユーザでログインします。
hadoop login:root
Password:
Last login: ...
[root@hadoop ~]#

ネットワーク設定のため、ifcfg-eth0をviで開きます
[root@hadoop ~]# vi /etc/sysconfig/network-scripts/ifcfg-eth0

ほとんど何も書かれていないので、[i](insert mode)して、以下の設定を記載し、[Esc]+[:wq]で書き込み終了します(ボールドが変更する箇所)
DEVICE="eth0"
BOOTPROTO=static
HWADDR="xx:xx:xx:xx:xx:xx"
IPADDR=192.168.137.101
NETMASK=255.255.255.0
NETWORK=192.168.137.0
GATEWAY=192.168.137.1
BROADCAST=192.168.137.255
NM_CONTROLLED="no"
ONBOOT="yes"
PEERDNS="no"


DNS設定のため、/etc/resolv.confをviで開きます
[root@hadoop ~]# vi /etc/resolv.conf

何も書かれていないので、[i](insert mode)で設定を記載して、[Esc]+[:wq]で書き込み終了します
nameserver 192.168.137.1

ネットワークを再起動します
[root@hadoop ~]# /etc/rc.d/init.d/network start

ifconfigでネットワーク確認します
[root@hadoop ~]# ifconfig
eth0      Link encap:Ethernet  HWaddr xx:xx:xx:xx:xx:xx
          inet addr:192.168.137.101  Bcast:192.168.137.255  Mask:255.255.255.0
          inet6 addr: fe80::20c:29ff:fe16:27c3/64 Scope:Link
          UP BROADCAST RUNNING MULTICAST  MTU:1500  Metric:1
          RX packets:697 errors:0 dropped:0 overruns:0 frame:0
          TX packets:178 errors:0 dropped:0 overruns:0 carrier:0
          collisions:0 txqueuelen:1000
          RX bytes:79044 (77.1 KiB)  TX bytes:17405 (16.9 KiB)

lo        Link encap:Local Loopback
          inet addr:127.0.0.1  Mask:255.0.0.0
          inet6 addr: ::1/128 Scope:Host
          UP LOOPBACK RUNNING  MTU:16436  Metric:1
          RX packets:53 errors:0 dropped:0 overruns:0 frame:0
          TX packets:53 errors:0 dropped:0 overruns:0 carrier:0
          collisions:0 txqueuelen:0
          RX bytes:4928 (4.8 KiB)  TX bytes:4928 (4.8 KiB)

Tera Termから接続

ホストOS(Windows)で「Tera Term」を起動します。
ホストにCentOSのIPアドレスを指定し、サービスを「SSH」を指定して「OK」をクリックします。


「セキュリティ警告」が表示されますが、ひるまずに「OK」をクリックします。


ユーザ名を「root」、パスフレーズにパスワードを指定して「OK」をクリックします


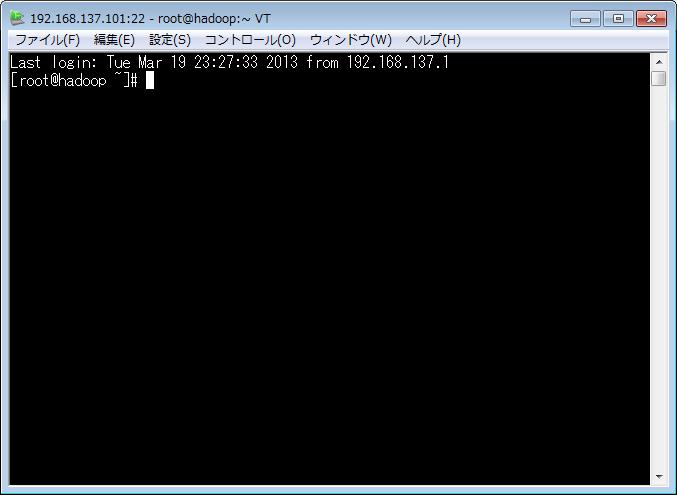
無事接続されました。おめでとうございます。


Proxy経由でyum,wget


Proxyが設定されているネットワーク環境の場合、yum.confで設定する必要があります。yum.confをviで開きます
[root@hadoop ~]# vi /etc/yum.conf

proxyのhost(proxy.yourcompany.com)とport(8080)を以下のように記述します
proxy=http://proxy.yourcompany.com:8080

yum updateでOSをアップデート
[root@hadoop ~]# yum update

盲目的にyes
Is this ok [y/N]: y

どんなことがあっても盲目的にyes
警告: rpmts_HdrFromFdno: ヘッダ V3 RSA/SHA1 Signature, key ID c105b9de: NOKEY
Retrieving key from file:///etc/pki/rpm-gpg/RPM-GPG-KEY-CentOS-6
Importing GPG key 0xC105B9DE:
 Userid : CentOS-6 Key (CentOS 6 Official Signing Key) 
 Package: centos-release-6-2.el6.centos.7.x86_64 (@anaconda-CentOS-201112091719.x86_64/6.2)
 From   : /etc/pki/rpm-gpg/RPM-GPG-KEY-CentOS-6
Is this ok [y/N]: y

しばらくしたら終わります。
  udev.x86_64 0:147-2.46.el6
  upstart.x86_64 0:0.6.5-12.el6
  util-linux-ng.x86_64 0:2.17.2-12.9.el6
  vim-minimal.x86_64 2:7.2.411-1.8.el6
  xfsprogs.x86_64 0:3.1.1-10.el6
  yum.noarch 0:3.2.29-40.el6.centos
  yum-plugin-fastestmirror.noarch 0:1.1.30-14.el6
  zlib.x86_64 0:1.2.3-29.el6

Complete!

wget をインストールします
[root@hadoop ~]# yum -y install wget

wgetのProxyを設定するため、wgetrcをviで編集します
[root@hadoop ~]# vi /etc/wgetrc

http_proxyの行を追加します
# You can set the default proxies for Wget to use for http, https, and ftp.
# They will override the value in the environment.
#https_proxy = http://proxy.yoyodyne.com:18023/
#http_proxy = http://proxy.yoyodyne.com:18023/
#ftp_proxy = http://proxy.yoyodyne.com:18023/
http_proxy = http://proxy.yourcompany.com:8080/
https_proxy = https://proxy.yourcompany.com:8080/
ftp_proxy = http://proxy.yourcompany.com:8080/

次回に続く

VMware De CentOS Part.1 CentOSのインストール

Part1. CentOSのインストール

目標
  • VMWareの簡易ツールを使わずに素の状態でCentOS(minimal)をインストールする

事前準備
  • ここでVMware Playerの無償版をダウンロード&インストール
  • SSHのクライアントとしてここでTeraTermをダウンロード&インストール

以下のmirrorからCentOS6.2のisoイメージをダウンロードしておく。

VMware Playerを起動して、「新規仮想マシンを作成」をクリックします


「後でOSをインストール」を選択して「次へ」をクリックします


ゲストOSを「Linux」、バージョンを「Cent OS 64 ビット」を選択して「次へ」をクリックします


「仮想マシン名」を命名して「次へ」をクリックします


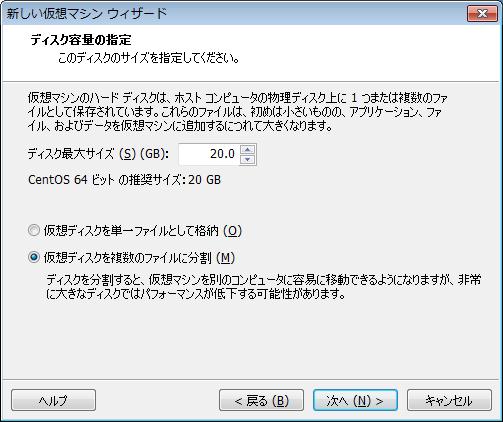
あまり考えずに「次へ」をクリックします


「完了」をクリックします


VMwareから作成した仮想マシンを選択して「仮想マシンの設定の編集」をクリックします


デバイスでCD/DVDを選択して、「ISOイメージファイルを使用する」にダウンロードしたCentOSのisoイメージを指定して、「OK」をクリックします。


以下の画面で「Install or Upgrade an existing System」で【Enter】を押下します

以下で「Skip」を選択して【Enter】を押下します

おもむろにVMwareの画面が大きくなりますが、ひるまずに「next」をクリックします。


グローバルじゃない人は「Japanese(日本語)」を選択して、「next」をクリックします。


キーボードは「日本語」を選択して、「次」をクリックします。


あまり考えずに「次」をクリックします。


「はい、含まれていません。」と強がりながら「次」をクリックします。


ホスト名に適当な名前を命名して「次」をクリックします


「アジア/東京」を選択して「次」をクリックします


rootパスワードに適当なパスワードを、及び確認にも同じパスワードを入力して「次」をクリックします


「Use All Space」が選択されており、かつ「パーティションのレイアウトをレビューまたは修正する」のチェックが外れていることを確認して「次」をクリックします。


警告にひるむことなく、「write changes to disk」をクリックします


インストールが進むのをひたすら待ちます。


「おめでとうございます。」に浮かれることなく「再起動」をクリックします


    2013年3月17日日曜日

    Paralles de CentOS Part.1 CentOS インストール

    あたいのmacbook airでHadoopを思いのままに弄りたいという渇望。

    CentOSのインストール
    以下のmirrorからCentOS6.2のisoイメージをダウンロードしておく。
    http://ftp.riken.jp/Linux/centos/6.2/isos/x86_64/CentOS-6.2-x86_64-minimal.iso

    ParallelsでゲストOSを新規作成し、DVDまたはイメージファイルからOSインストールを指定して「続行」をクリックします

    インストール元にダウンロードした「CentOS-6.2-x86_64-minimal.iso」を指定して「続行」をクリックします


    適当な名前を付けて「続行」をクリックします。


    「Install or upgrade an existing system」を選択して【Enter】を押下します


    「Skip」を選択して【Enter】を押下します


    やたらでかい画面が表示されますが、ひるまずに「Next」をクリックします


    やたらでかい画面の中から「Japanese(日本語)」を選択して、「Next」をクリックします


    キーボードの選択では「日本語」を指定して「次」をクリックします


    分かった振りをしながら「Basic Storage Devices」を指定して「次」をクリックします


    警告ダイアログが表示されてもひるまずに「はい、含まれていません」をクリックします


    適当なホスト名を決めて「次」をクリックします


    「アジア/東京」が選択されているのを確認して「次」をクリックします


    rootのパスワードを指定して、「次」をクリックします


    どのタイプのインストールか分かった振りを指定して「次」をクリックします


    ひるまずにノータイムで「Write Changes to disk」をクリックします


    ひたすら待ちます。


    何の感情も感じられない「おめでとうございます。」というメッセージをあとに、粛々と「再起動」をクリックします


    次回に続く